I have figured out that the best time for us to do school is around 1:00 when Wyatt is napping because honestly we wouldn't get anything done otherwise. It only takes us about 45 minutes to do each day's activities. And I can truly see a lot of growth in Charlie from the routine and structure of the day.
Let me tell you a few things that I like about this preschool curriculum before I go into the recap.
Click here to view morClick here to view more details
- It is Bible based. Each week has a different Bible story to focus on.
- It is flexible. There are lesson plans for each week. But they are adaptable for the needs of your child.
- It is FUN! The lessons are not boring but things that a preschooler will enjoy doing.
X marks the Spot- Letter of the week is X
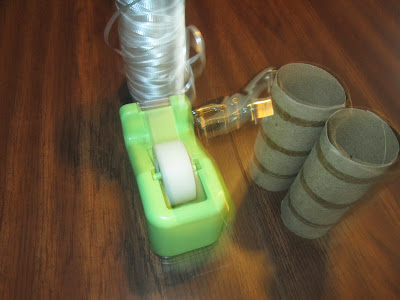
This was our introduction week. We started by making binoculars from toilet paper rolls, tape, and string.
Other activities this week included:
- making a treasure map that will be used all year
- making an alphabet notebook that is also used throughout the year
- sang The B-I-B-L-E
- went on a shape hunt for rectangles
- glued a rectangle out of craft sticks
- played tic-tac-toe with x made from craft sticks
G is for Garden
This week was a lot of fun. We started by reading the story of God's Creation. While writing this I realized that I don't have a picture of the awesome book that we made all week long. Bummer. I might add one later.
This is the flower snack that we made one day with strawberries and bananas.
These are pumpkin seeds that we wrapped in a wet paper towel and left in a warm, dark place. This is what they looked like at then end of the week.
These are the cucumber seeds.
Other activities that week included:
- Reading The Tiny Seed by Eric Carle
- drawing g's in the alphabet book
- singing He's Got the Whole World in His Hands"
- singing "The Creation Song"
- counting seeds in egg carton
Week Three:
A is for Apple
This has been my favorite week so far. it was jam- packed with activities. Our Bible story for the week was Adam and Eve. We made apple prints using an apple half, and we used these all week long in various activities.
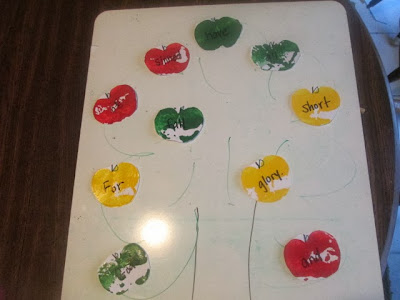
Here is the verse Romans 3:23 written on different apples. Charlie picked the apples off the tree.
Then we put the words in order. We were talking about sin a lot this week. He had a hard time understanding that he was a sinner. He could tell me what sin was and he didn't mind saying that his sister or even I was a sinner. But he didn't want to say that he sinned. But by the end of the week he understood.
This is an apple tree that we made over 3 days using his feet as the trunk, hands as branches, and fingers for apples.
We also did a taste test using various kinds of apples. He decided that a Golden Delicious is his favorite kind of apple. We made applesauce in the crockpot as well.
We picked apples from my artificial tree. I had to post this picture because while hiding the apples in the tree, I found a block in there. See the blue spot in the tree. Oh, the joys of having small children in your home!
Here we had written down names of sins using invisible ink (lemon juice). Then we heated it up over the stove and watched the words reappear. We talked about how Adam and Eve tried to hide from their sin, but we can never hide from God or from our sin.
It has been a good three weeks. I look forward to teaching Charlie each day. We do have some difficult days. I have learned that flexibility is key. And I also plan to implement the advice a friend just recently gave me about homeschooling boys...and that is take lots of breaks. Don't try to sit down and do it all at once.
Thanks for reading! Your comments and advice are always appreciated!
If you are interested in God's Little Explorers preschool curriculum Click here to view more details.
All proceeds go to fund an orphanage in India.


